
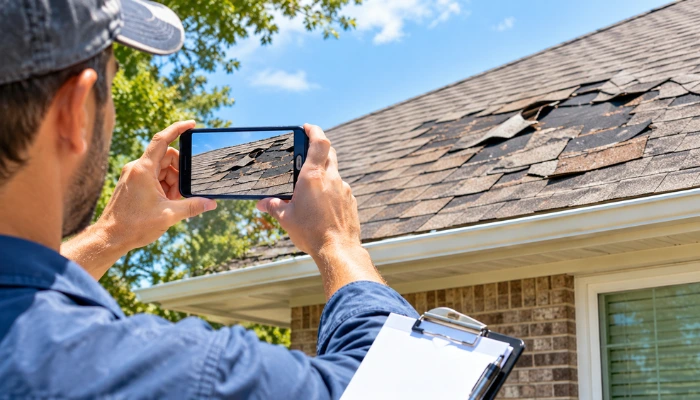
When your roof is damaged, taking photos and keeping detailed records can provide useful evidence for an insurance claim. To photograph and document roof damage, capture clear images of shingles, flashing, gutters, roof surfaces, and any areas inside your home affected by water. These records can help show the extent of the damage and support your insurance claim.
However, documentation should always begin with safety. You do not need to climb onto an unstable or damaged roof to collect useful evidence. Ground-level photos, interior pictures, inspection records, and notes can all help create a more complete record.
Take clear images before temporary repairs change the condition of the property, when it is safe to do so. Keep the original files and organize them with dates, locations, and other relevant information. A detailed record can make it easier to explain what happened and where the damage is located.
Start With Safety Before Documenting Roof Damage
Before taking pictures, look around the property for conditions that could make documentation dangerous. Storms can leave loose roofing materials, fallen branches, standing water, damaged electrical components, or unstable surfaces behind. Avoid climbing onto the roof yourself, especially when it is wet or visibly compromised.
Instead, photograph and document roof damage from the ground and record any interior damage from safe locations. If a closer inspection is needed, ask a qualified roofing professional to assess the property. Clear evidence can support your insurance claim, but personal safety should always come first.
Check the Area Before Taking Photos
Before photographing roof damage, inspect the surroundings from a safe position. Look for fallen branches, broken materials, exposed electrical components, standing water, or other hazards left behind by severe weather. Do not walk across damaged roofing materials simply to capture a closer image.
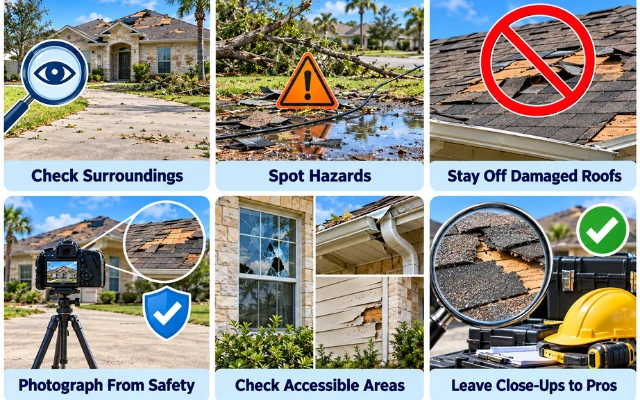
Instead, use a safe location that provides a clear view of the affected area. Check windows, exterior walls, gutters, and other accessible sections for visible signs of damage. If the roof cannot be safely accessed, leave close-up documentation to a qualified roofing professional. Taking fewer photographs is better than risking an injury while trying to document every detail yourself.
Use Safe Ground-Level Photography
- Step back from the home: Capture wider images that show the roof and surrounding exterior.
- Photograph each side: Take separate views of the front, rear, and visible roof sections.
- Use safe angles: Move around the property instead of approaching unstable areas.
- Capture fallen materials: Photograph shingles, branches, or debris from a safe position.
- Document gutters: Take pictures of damaged, detached, or blocked gutter sections.
- Photograph exterior walls: Look for visible signs connected to roof-related water entry.
- Include windows: Capture damaged screens, frames, or visible water-related problems.
- Use natural light: Take photos when lighting makes the damage easy to see.
- Avoid unsafe ladders: Do not climb simply to get a closer photograph.
- Photograph from several distances: Combine wide views with closer safe images.
- Keep people out of danger: Never ask someone to enter an unsafe area for a photo.
- Hire a professional when needed: Use a qualified roofer for areas that cannot be safely reached.
Capture Clear Photos of Every Damaged Area
Once the property can be documented safely, photograph each visible area of roof damage carefully. Start with wider images that show the overall location before taking closer pictures of individual problems.
This provides context and helps show where specific damage appears on the property. Photograph missing or damaged shingles, exposed areas, bent flashing, damaged gutters, fallen materials, and other visible conditions. If water entered the home, document affected ceilings, walls, attic areas, and belongings as well.
Take several photos instead of relying on a single image. Make sure pictures are sharp, properly lit, and detailed enough to show the condition without excessive zooming or editing. Original images should be preserved for your records.
Photograph Damage From Multiple Angles
- Wide roof view: Show the affected roof section and its position on the property.
- Medium-distance image: Move closer safely to make the damaged area easier to identify.
- Close-up photograph: Capture visible cracks, tears, missing materials, or other specific problems.
- Side angle: Photograph damage from another direction to show its depth or shape.
- Shingle damage: Capture lifted, broken, missing, or displaced shingles when visible.
- Flashing damage: Photograph bent, separated, or visibly damaged flashing sections.
- Gutter damage: Show dents, separation, sagging, or other visible gutter problems.
- Roof debris: Photograph fallen roofing pieces or storm debris around the property.
- Water entry point: Capture visible areas where water appears to have entered the home.
- Interior damage: Photograph affected ceilings, walls, floors, or other accessible areas.
- Surrounding condition: Include nearby roofing materials to provide useful visual context.
- Repeated evidence: Take multiple clear images when one photograph cannot show enough detail.
Include the Entire Roof Area in Your Documentation
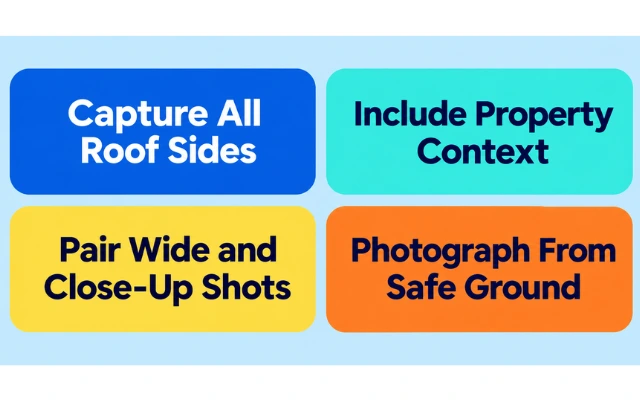
Individual close-up photos can show specific problems, but wider images provide important context. Photograph each visible side of the roof and include enough of the surrounding property to identify where the damage is located. For example, a close-up image of damaged shingles may be difficult to understand without knowing which roof section contains them.
Wider photographs can connect individual problems to the overall roof condition. When possible, capture the front, rear, and side elevations from safe ground-level positions. This approach creates a more organized visual record and helps distinguish separate damaged areas instead of presenting isolated photographs without context.
Keep Original Photos and Important Details
Keep the original versions of every photograph you take. Avoid applying filters, cropping away important information, or heavily editing images before saving the originals. Your phone or camera may automatically store useful details such as the date and time, which can help organize the evidence later.
Create folders based on areas such as roof, gutters, exterior, interior, and debris. You can also rename copies with simple descriptions that identify the location shown. Back up the files to a secure storage location so they are not lost if your phone or computer becomes damaged. Maintaining organized originals makes your documentation easier to review.
Roof Damage Documentation Checklist
| Documentation Item | What to Capture | Why It Matters |
| Overall roof | Wide photos of visible roof sections | Provides context for individual damage |
| Damaged shingles | Close-ups of affected shingles | Shows specific roofing problems |
| Flashing | Visible bends, gaps, or separation | Documents potential water-entry areas |
| Gutters | Dents, separation, or displaced sections | Records related exterior damage |
| Interior areas | Ceiling, wall, and attic damage | Shows possible effects inside the home |
| Debris | Fallen roofing materials and branches | Documents visible materials around the property |
| Date and time | Original photo information | Helps organize when evidence was captured |
| Weather evidence | Relevant storm or weather information | Adds supporting context to the documentation |
Organize Your Roof Insurance Claim Evidence
Photo File Organization: Keep images grouped by roof area and damage type for easier review and reference.
Damage Location Notes: Record where each damaged area is located on the roof or inside the property.
Date and Time Records: Preserve dates that help connect documented damage with the reported weather event.
Repair and Inspection Records: Keep inspection reports, estimates, invoices, and related documents together for reference.
Storm-Related Evidence: Save relevant weather information and other records connected to the reported damage.
Before-and-After Photos: Keep earlier property photos when available to show its condition before the damage occurred.
Document Interior and Exterior Roof Damage
Roof problems can affect more than the visible roofing surface. Water entering through damaged areas may leave signs on ceilings, walls, insulation, attic materials, or belongings inside the home.
Photograph these areas from safe positions and capture enough of the surrounding space to show where the damage occurred. Exterior evidence should also include accessible gutters, siding, windows, roof edges, and fallen materials when they are visibly affected. Try to document the relationship between exterior problems and interior signs without making assumptions about the exact cause.
Wide photographs can establish location, while closer images can show details such as stains, damaged materials, or visible moisture. Keeping both types of images creates a more complete record of the property’s condition.
Photograph Water Damage Inside the Home
Interior photographs can provide important supporting evidence when a roof problem has allowed water into the property. Photograph affected ceilings, walls, floors, attic areas, insulation, and other visible surfaces from safe locations. Take both wider images showing the room and closer photographs showing specific marks or damaged materials.
Capture each affected room separately and avoid cleaning or changing the area before documenting it when doing so is safe. If water is still present, avoid electrical hazards and do not enter unsafe areas. Keep the original images and note which room each photograph represents. A clear interior record can help show the visible effects associated with a roof-related incident.
Connect Interior Damage With Exterior Problems
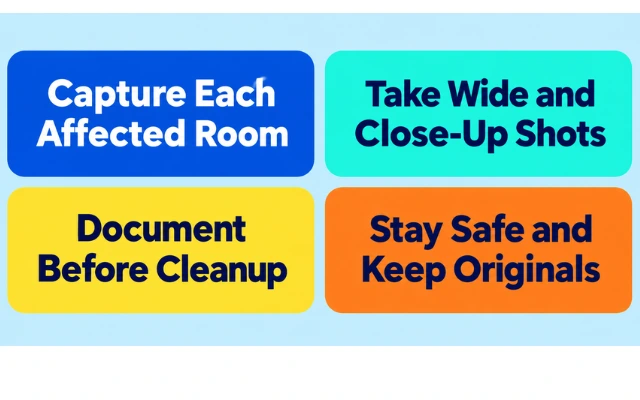
Ceiling Stains Photograph stains and identify the room where each affected ceiling area appears.
Wall Damage Capture visible moisture marks, peeling materials, or other related changes.
Attic Evidence Document visible moisture or damage from a safe and accessible position.
Roofing Damage Match visible exterior problems with affected interior areas when possible.
Water Entry Areas Record locations where water appears to have entered the property.
Affected Belongings Photograph items showing visible damage from roof-related water entry.
Record Supporting Information for Your Insurance Claim
Photos are only one part of documenting roof damage for an insurance claim. Written records can provide additional context about when the problem was discovered, what happened before the damage appeared, and what steps were taken afterward. Keep notes organized and store supporting documents with your original photographs.
Record important dates, observations, professional inspections, temporary repairs, and expenses related to protecting the property. Avoid throwing away damaged materials before they have been properly documented unless leaving them in place creates a safety concern. Keeping a complete record can make it easier to explain the condition of the property and provide supporting information when your claim is reviewed.
Record when the damage was noticed: Write down the date and approximate time when you first discovered the roof damage.
Note the suspected weather event: Record the storm, heavy rain, wind, hail, or other event associated with the damage.
Document temporary protection: Keep notes about tarps, emergency coverings, water removal, or other immediate protective steps.
Save professional inspection records: Keep copies of roofing inspections, written findings, recommendations, and related documentation.
Keep estimates and receipts: Store repair estimates, invoices, receipts, and other expenses connected to the property damage.
Preserve claim communications: Keep copies of relevant emails, letters, messages, and other communications about the claim.
Common Mistakes When Documenting Roof Damage
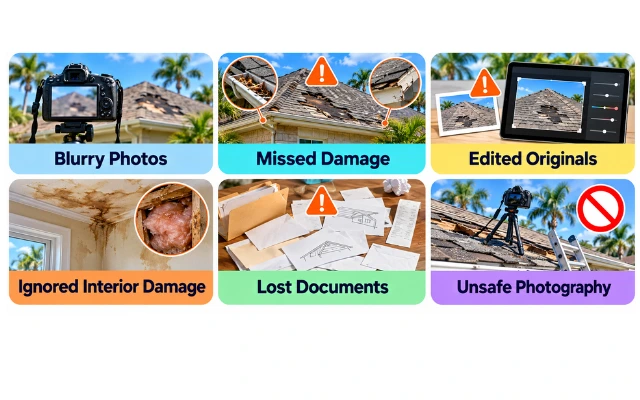
Roof damage documentation can become less useful when important details are missed or photographs do not clearly show the condition of the property. Taking pictures quickly without organizing them can also make it difficult to identify where specific damage occurred.
Avoid focusing only on the most obvious roof problems. Interior areas, gutters, exterior surfaces, and debris may also provide useful supporting evidence. Never put yourself in danger just to capture a closer image.
Keep original photographs and supporting records together, and make backup copies when possible. Careful documentation can help create a clearer record of the property’s condition before repairs or cleanup change the visible evidence.
- Taking blurry photographs: Use clear, properly focused images that make visible damage easy to identify.
- Only photographing obvious damage: Document both major problems and other visible areas that may be affected.
- Editing original images: Keep unedited originals before making any copies or adjustments for organization.
- Ignoring interior damage: Photograph ceilings, walls, attic areas, and belongings showing visible related damage.
- Losing supporting documents: Keep estimates, receipts, inspection reports, and other records in one organized location.
- Taking unnecessary safety risks: Never climb onto an unstable or damaged roof simply to obtain a closer photograph.
Frequently Asked Questions
How many photos should I take for a roof insurance claim?
There is no universal number of photographs required for every claim. Take enough clear images to document each visible damaged area, including wide views and closer details. Photograph the exterior and any related interior damage from safe positions. Keep the original files and organize them by location so individual images are easier to identify later.
Should I take pictures of my roof before contacting my insurance company?
If it is safe to do so, documenting visible conditions before repairs or cleanup can help preserve a record of the property. You do not need to climb onto the roof. Ground-level photographs can show roof sections, gutters, debris, and other accessible areas. Follow your insurer’s specific instructions regarding documentation and claim reporting.
Can I photograph roof damage without getting on the roof?
Yes. Many roof conditions can be documented from the ground using wide and closer photographs taken from safe positions. You can also photograph accessible exterior areas and interior signs of damage. If close inspection is necessary, a qualified roofing professional can assess areas that are unsafe or impossible for you to reach safely.
Should I photograph damage inside my home too?
Yes. If roof damage has resulted in visible problems inside the property, photograph affected ceilings, walls, attic areas, floors, insulation, or belongings from safe locations. Take wider images to show the room and closer images to show specific damage. Keep the original photographs and note which room each image represents.
What information should I record with my roof damage photos?
Record useful details such as the date, approximate time, location, and description of the damage shown. Organize photographs by areas such as roof sections, gutters, exterior surfaces, and interior rooms. You can also keep notes about when the damage was discovered, weather conditions, inspections, temporary protection, and related expenses.
Should I keep the original roof damage photos?
Yes. Keep the original photographs in their original format and make backup copies when possible. Avoid replacing originals with edited or compressed versions. Original files may retain useful information such as capture dates and can provide a more complete record of the property’s condition. Store them securely with your other claim-related documents.
Conclusion
Clear photographs and organized records can create a useful record when documenting roof damage for an insurance claim. Start with safety and avoid climbing onto unstable or damaged roofing surfaces. Capture wide views as well as detailed photographs of visible problems, and document related damage inside the property when applicable.
Keep original photographs, written notes, inspection documents, estimates, receipts, and other supporting records together. Organizing everything by location and date can make individual pieces of evidence easier to understand. Most importantly, follow your insurance company’s documentation requirements and seek professional help when an area cannot be safely inspected or photographed.